
Creating a new iCloud email address is easy and can be done on many Apple devices, such as iPhones, iPads, and Macs.
This post will show you how to create a new iCloud email address, explore the benefits of using an iCloud email, and provide tips for setting up and managing your new account.
Benefits of Using an iCloud Email
Before diving into the process of creating a new iCloud email address, it's essential to understand the benefits of using an iCloud email account. Here are some of the key advantages:
- Exclusivity: iCloud accounts can only be created on Apple devices, indicating that the user is an Apple user. This exclusivity can be beneficial for those who prefer using Apple products.
- Integration with Other Apple Services: With an iCloud account, you can easily access other Apple services, such as iCloud Drive, Calendar, Contacts, and Notes, all synchronized across your devices.
- Security: Apple has a strict privacy and security policy, ensuring the protection of personal information and emails.
- Hide My Email: iCloud+ offers a service called “Hide My Email” that generates random addresses for users to use when registering on websites and services, keeping their personal addresses hidden.
- No Ads: Apple’s email service does not display ads between messages.
- Custom Domain: Users have the option to customize their iCloud email account with a custom domain for a competitive price with the iCloud+ plan (USD 0.99/month).
How to Create a New iCloud Email Address?
Creating a new iCloud email address is a simple process that can be completed on your iPhone, iPad, or Mac. Here are the detailed steps:
On an iPhone or iPad:
- Open the Settings App: Locate the Settings app on your home screen and tap on it.
- Tap on Your Name: Your name will appear at the top of the Settings app.
- Tap on iCloud: Scroll down and tap on “iCloud.”
- Find and Tap on iCloud Mail: Select “iCloud Mail” from the list of options.
- Activate the Option “Use on This iPhone” (or iPad): Turn on the toggle next to “Use on This iPhone” (or iPad) to activate iCloud Mail.
- Activate iCloud Drive: Ensure that iCloud Drive is turned on to keep your Mail settings updated across all your devices.
Your iCloud email has been set up correctly. Your new account is now ready to use. Open the Mail app and read or send texts.
On a Mac:
- Choose Apple Menu > System Preferences: Click on the Apple logo in the top-left corner of your screen and select “System Preferences.”
- Select iCloud: Click on “iCloud” from the list of preferences.
- Select iCloud Mail: Click on “iCloud Mail” to activate it.
- Follow Onscreen Instructions: Follow the onscreen instructions to create a new iCloud email address.
If you don’t see onscreen instructions after turning on iCloud Mail on your Mac, it means you already have a primary iCloud email address.
Tips for Setting Up and Managing Your New iCloud Email
When setting up an email account in iCloud, it is crucial to take necessary precautions and follow the suggested tips for security:
- Choose a Good Username: When creating an address, choose a name carefully that represents you well. Avoid writing anything and think it through because it cannot be changed after creation.
- Choose a Secure Password: Create a strong password for your iCloud account. Avoid using the same password for other sites or services. Stay away from obvious passwords like “123456” or “password.” Also, refrain from using personal information like your name or birthdate in your password. For added security, consider using a trusted password manager to securely store your passwords.
- Do Not Forget Security Questions: Ensure that you record all the necessary security information provided by Apple during the account creation process, including security questions and recovery codes. It is important to keep this information safe, as it may be required in the future to access your account in case of password forgetfulness or potential hacking attempts.

How to Access Your iCloud Email on Different Devices?
After creating the account, iCloud email can be accessed from multiple devices by activating it in the Mail app on your iPhone, iPad, and Mac, allowing synchronization across all devices. You can also access your messages through an internet browser on other platforms by visiting the iCloud website and logging in.
Frequently Asked Questions
- Can I Change My Primary/Login Apple ID Email Address?
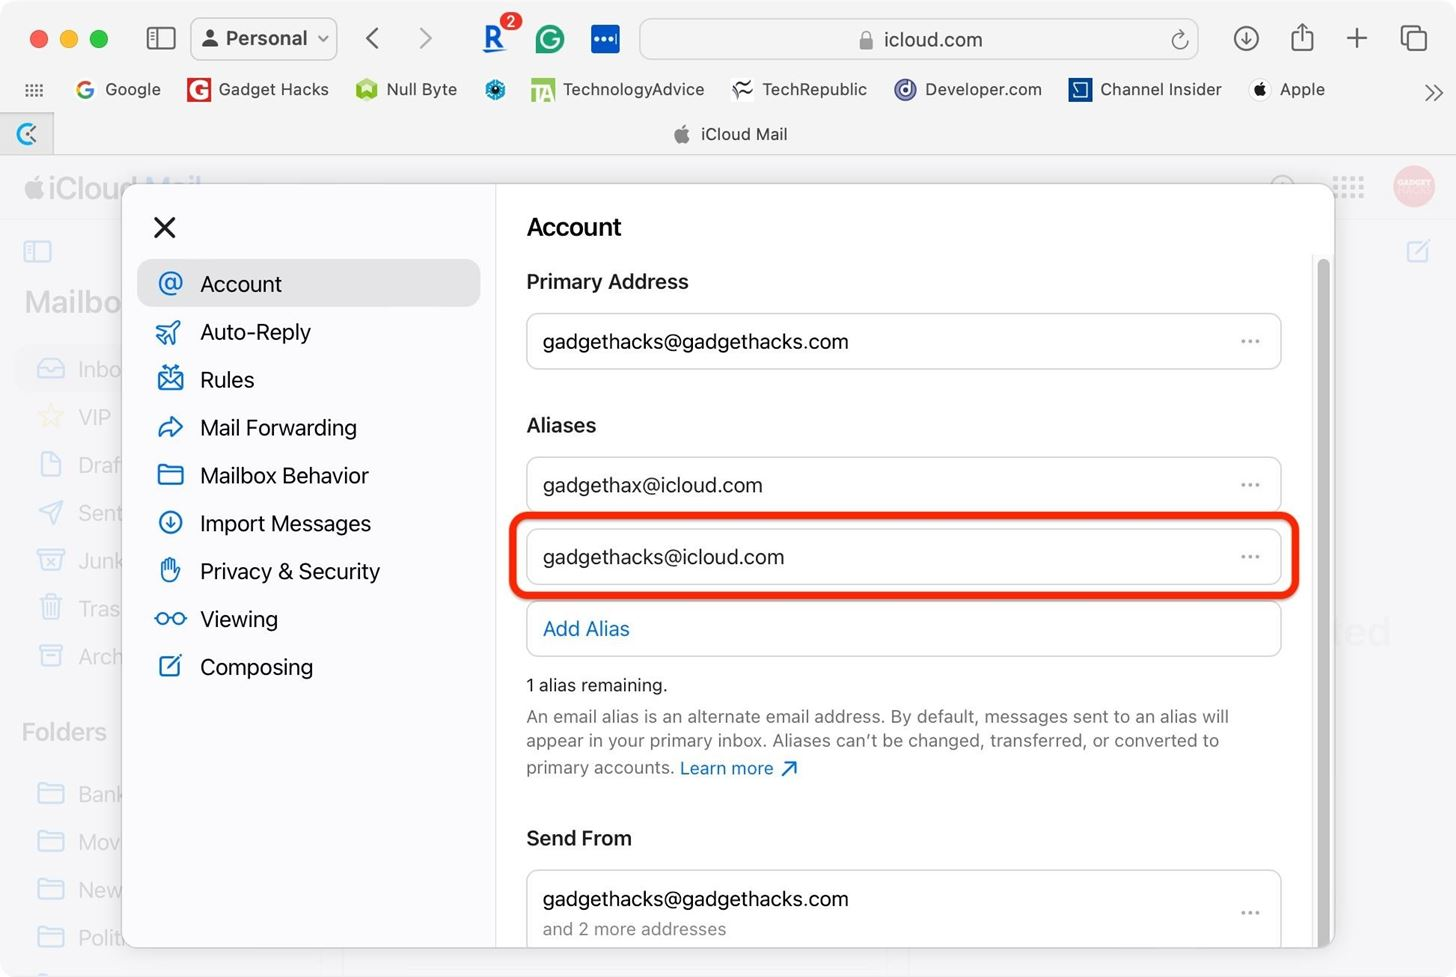
No, if your main Apple ID email address is an Apple address, like @icloud.com, @mac.com, or @me.com, you can't change it. You can either make a new Apple ID and start over or set up an alias.
- How Do I Set Up an iCloud.com Email Address?
On an iOS device, go to Settings > iCloud > turn on Mail, then follow the onscreen instructions. On a Mac, choose Apple menu > System Preferences > select iCloud > select iCloud Mail.
- What Happens If I Create a New iCloud Email Address?
Creating a new iCloud email address will not replace your existing Apple ID. You can use the new email address as a secondary account for additional services or as an alias.
- Can I Use Hide My Email with My New iCloud Email?
Yes, with your new iCloud email address, you can use the tool Hide My Email. Users can use random addresses to sign up for websites and services with this function, which hides their real addresses.
- How Do I Access My iCloud Email on the Web?
If you go to the iCloud website and enter your Apple ID and password, you can get to your iCloud email online.

How to Manage Your New Email Address?
After creating a new email address and ensuring its safety, you should learn how to manage your inbox well. Taking good care of your email address will help you stay organized, find important messages quickly, and communicate clearly. So, we'll show you how to set up your inbox, organize your emails, and understand proper email etiquette.
Setting Up Your Inbox
- Change the Settings for Your Inbox: Look through the settings for your email service to customize your inbox. This could include choices about the display density, whether to show conversations, how to create email signatures, and how to set up automatic answers.
- Make Folders or Labels: To keep your emails in order, you might want to make folders or labels. These can sort emails into different groups, such as work, personal, financial, or project-specific. Moving emails to the right folders or labeling them can make it easier to find them later.
- Use filters: Email filters are powerful tools that sort new emails automatically based on certain rules. You can set up filters to sort or prioritize emails immediately, mark them as important, or send them to certain folders.
Organizing Your Emails
- Archive or Delete Unnecessary Emails: Go through your messages often and archive or delete emails that you don't need anymore. Your inbox will be less crowded and it will be easier to find important messages.
- Set Important Emails First: Come up with a way to find and set important emails first. Mark emails that need to be looked at or followed up on right away with flags, stars, or labels.
- Make use of Search and Filters: Use the search tool that comes with your email provider to find specific emails. Filters and complicated search operators can help you narrow down your search results and quickly find specific emails.
Understanding Email Etiquette
- Write Emails That Are Clear and to the Point: When you write emails, make sure that your message is clear and to the point. Make sure your emails are easy to read and understand by using correct grammar, punctuation, and style.
- Pay Attention to Tone: Emails can be misunderstood, so pay attention to how you sound. It can seem like you're yelling if you use all capital letters, so pick your words carefully to get your point across.
- Reply Quickly: Answer emails quickly. Even if you can't always answer right away, try to do so within a reasonable amount of time to keep the lines of conversation open.
- Use Professional Language: If you're talking to someone for work, you should use professional language and not slang or casual words. Keep a polite and thoughtful tone in your emails.
By following these steps and tips, you can easily create a new iCloud email address and start enjoying the benefits of using an Apple-exclusive email service.
